Header/Social Media Icons

Navigation Bar

Wednesday, December 16, 2015

Christmas is Here!!


     Christmas is just around the corner! There are only a few days left of school. Us teachers, and the kids, are looking forward to a nice relaxing break. If you are anything like us you may have procrastinated preparing for the rest of the week... But that's OK! We have some great winter activities you can easily print and not have any more prepping to do. All the activities are easy, fun and take some time for the kiddos to work on.

     Check out our Christmas Writing pack! It has so many different prompts to write about. Our students have absolutely LOVED writing when using these prompts. It's such a simple thing to hit print and copy. We let them pick which prompt they wanted (which most kids picked two or three different ones).  We used this as our center writing activity, but this could easily be used for an independent writing block.

     Our students just absolutely LOVE making a hat for each season! For winter we have the following hats:


Check out our store for more those fun Christmas activities!

 Merry Christmas and Happy Holiday's!
-KE Class-Works


Saturday, November 14, 2015

Gobble Gobble! Thanksgiving Fun!

Hey everyone! We are sure LOVING the beautiful fall weather here in Saint George, Utah! There's nothing better than the holiday season with pumpkin scents, leaves falling and 44 cute kids to enjoy these exciting times with! We made a Thanksgiving Bundle that we would like to share with you. The best thing about it is that it is NO PREP! What's better than NO PREP for a teacher, right?!  All you need to do is print and copy! Our kids have been loving all these fall activities and we are excited to do more this coming week before Thanksgiving break! Here is our Thanksgiving Activity Bundle...jam packed with loads of fun:


This Thanksgiving Bundle includes:

-25 different bingo cards (15 in color, 10 in black and white)
*This bingo card set includes cards with fall words (perfect for the upper grades!), and cards with fall pictures (perfect for the lower grades!)
-Roll a Turkey Game
-Label a Turkey
-Turkey Hat Template
-Thankful Turkey
-2 different Thankful Pennants
-Templates to make your own turkey
-16 different fall writing prompt pages 
-Fall Scavenger Hunt

Our Turkey, Native American and Pilgrim hats have sure been a hit with our classes and tons of others! Snatch your copy of these templates on our store today...Get 'em while they're hot!


We love having a little feast with our classes before we leave for Thanksgiving Break. These darling placemats are the PERFECT addition to our table setting. Use these placemats at a school feast, or have your students bring them home to enjoy at their family feast!


What's better than recognizing everything that we are grateful for this Thanksgiving season? These "Thankful Trees" are the perfect activity for any age...kid or adult! Download your FREEBIE today!


A huge hit with the kids has been our "Label a Turkey" activity. They were so excited to go home and teach their families all about the parts of a turkey! Get your Turkey FREEBIE today! 
Gobble Gobble.


With the Thanksgiving season being upon us, we feel extremely grateful for our dream jobs as First Grade teachers, and for our 44 little people that we get to spend each day teaching! There really is nothing better. We are thankful for you as our followers and hope you have a Happy Thanksgiving! There is much to be grateful for.


Sunday, October 25, 2015

Halloween Hats!

    In need of a fun and easy craft for Halloween? These hats are perfect for what you are looking for! The students seriously love making them and my favorite part is how easy the prep is!!
All the teacher has to do is ask the students which hat they want and print off the template. 

     We start by showing my students the different hat options there are to choose from.  We write down who wants which hat. Then we print off how many copies of each hat we need. It is that simple! Then when Halloween comes we pass out the hat template they asked for. The students color and cut the hat out. All we do is staple the head band for them and they do all the rest!  We have classes of 22 students. We normally plan on an 45-60 minutes for our whole class to make their hats.

     This could easily be broken down into two sessions if you don't have a solid 45 minutes all at once. We recommend spending 15-20 minutes for the students to color their hats and then, on a different day, another 20-25 minutes to cut out and assemble the hats.

     The students absolutely love wearing their Halloween hat! Plus If someone doesn't bring a costume or if your school doesn't let your kiddos dress up this is a fun and easy activity that lets the kids feel like they are dressed up.

     Need an extension activity or want to align the project to a core subject? Here are a couple ideas:

1. Write about the hat they chose and why they chose it.

2. Make up a fun or silly Halloween story about the hat they chose.

3. Have the students write their own directions (a "how to report") on how to assemble the hat and see if their directions were in the correct order and made sense.

4. Need it a little simpler for younger grades? Have the students write 1 sentence on their connecting band (before it is stapled to fit their head) about their hat.  It could be something as simple as "I like the vampire." or "My bat has wings." 

5. Math extension? No problem! Graph how many of the different hats were chosen and then compare. Which hat was chosen the most? The least? 

6. You could even have the students turn this into an art contest and have them vote for their favorite hat. Then the students can tally up how many votes each hat received and see who the winner is.

     There are so many different and fun ways to incorporate this fun activity into your daily schedule! There are a total of 10 different Halloween hats to choose from! Check them out here:


Thanks for following! If you have any questions, please don't hesitate to comment below or email us at keclassworks@gmail.com!


-Kassidy & Emily


Monday, September 14, 2015

Back to School!!

Hey everyone!! It's been a little while since we last posted, and I bet you can guess why! Yep, that's right...school started and we have been crazy busy! 

We wanted to share with you our forms that we used for back to school night! We absolutely LOVE anything simple that keeps us organized. That's exactly what these forms are! They can all be found in our TPT store. We used 4 forms...

1. Student Information Sheet: outlines all the important information we need about our students. 

2. Flip Book: we included our contact info, homework info, supply list, our daily schedule and class policies. We LOVE this flip book because it includes a ton of info all in one simple book!

3. Parent 3-2-1 Form: This form asks parents to tell us 3 words that best describe their child, 2 things we should know about their child, and one goal they have for their child this year. 

4. Volunteer in Our Class Form: This is a great way for parents to select what days, times and projects they are available to do! 

These 4 forms kept our back to school night super simple and were LOW PREP! 

Here they are:


Visit our TPT store to download these forms! 

Thanks for reading! If you have any questions, please don't hesitate to contact us at keclassworks@gmail.com. 

Check back soon for our BIG CLASSROOM REVEALS!!! 

-KE Class-Works


Monday, September 7, 2015

EXTREME Classroom Makeover- Rug

    We just love how our classrooms are coming together! It has been a lot of fun decorating and adding that personal spin to our rooms.  There definitely have been a lot of IKEA purchases and bargain shopping around town and online.  
     One item I (Emily) have been looking for to add to my black with bright colors classroom theme was a colorful rug! I have seen a few floating around on Pinterest and other blogs. I FINALLY read where someone said they found this bright neon chevron rug at Big Lots. I was so excited!! I got I my car right away and drove to Big Lots. Of course what did I find? Big Lots was CLOSED! FOREVER! So I did a simple google search for the next closest one. It was 45 minutes away. Of course that one was closed down forever too! I had to have this rug though! It would be perfect with my theme and add that extra pop of bright colors in my reading corner next to a black bench. I convinced my husband to go on a road trip and drive 4 hours to where there were 5 different big lots within 45 minutes of each other.  It was my birthday that week so he couldn't say no 😀.  I searched all of those stores and NEVER found the rug I wanted!! 
     I was determined to have a rug that was chevron with bright colors! I continued by search for the rug online, but no luck. Then I came across several blogs that talked about painting the rug to the color you want. I figured I was already pairing basically everything in my room this year so one more thing would be fine!
     This project took about 6 hours from start to finish. I found a rug on Overstock.com for a fairly good price (about $40). 
Here is the rug before painting.
     I went to the craft store and bought acrylic paint and fabric medium. 
     I used two bottles for each color of acrylic paint and two bottles of the fabric medium. I mixed two parts paint to one part fabric medium and mixed it together.  Then I used a regular paint brush to paint 
    I painted one chevron line at a time. 


Here is my finished rug!
It will be perfect for my reading Corning!! Check back soon for pictures of our classrooms all finished!

Thanks for following! If you have any questions, please don't hesitate to comment below or email us at keclassworks@gmail.com!

-Kassidy & Emily


Sunday, August 30, 2015

Extreme Classroom Makeover- The Walls!

     It's crazy how fast the summer flies by! Especially when you are trying to get your classroom all set up and ready to go for your new students.  Setting up a classroom can be a lot of work! As teachers, we spend so much of your time in our classroom that it's great to add a personal touch to make your room your very own.  Adding your own style can really help set up the right environment to make a successful year.
     So if you don't absolutely love something in your classroom then why not change it, right? This summer we did an EXTREME classroom makeover.  We painted cupboards, tables, storage containers, easels, anything you can think of we probably painted it to give it a new fresh look. You can check out our other blog posts to read about the other paint adventures we did.  With lots of paint and man hours you can completely transform any area!  So let's talk about those lovely school walls!
     In our classrooms we have cinder block (our school is pretty old). There are layers after layers of paint on these walls. At some point, which can be seen where the paint chipped and the under colors show through, we had green walls, blue walls, maybe even yellow walls?  Then we ended with some form of a tan.  It was not a color that went with either classrooms decor.  
     WARNING! If you do not have at least a week to paint the walls or a lot of extra helpers save this project for another summer!  We spent about a full week of painting with both classrooms.  
     The first step is to find out what color paint you want.  Home Depot created a really cool app that can be used with your iPhone and the camera.  You can choose from different color swatches of paint and see what it would look like on an entire wall!  The app is called Project Color and can be found in the App Store.  
     We chose to buy the cheapest paint since it was going onto cinder block and we are teachers! 
     This particular brand was at Home Depot.  Emily tinted hers a grayish white to paint on all 3 walls, as well as, a gray gallon for an accent on the 4th wall.  Kassidy did a vibrant white on all 4 walls with pops of turquoise as the accent color.  It took a gallon of paint per wall.
     Now it is time to get the supplies! Be prepared to buy lots of roller brush pads!  We went through a lot because it was easier to do that then rinse them out and make a mess all over our new counter tops and sink.  
 
     A small paint brush will be needed to do the edge work.  
     The most time consuming part of the project was taping off!! We used Blue Painters tape. We taped EVERYTHING off! Such as: white boards, base boards, ceiling, cupboards, light switches, electrical outlets, etc.  It was a lot of taping that's for sure!
  Once all the taping is done you are ready to paint! 
   Funny story moment! After we finished taping and started painting in our rooms we found this tiny hole in Kassidy's classroom above where her desk normally goes.
     We have been saying to our Principal for years we would like to take down the wall in between our classrooms and put in one of those folding walls.  Oh my goodness it went ALL the way through to Emily's.  It's a start! 
     No that eyeball in the hole is NOT photoshopped! It is Kassidy's eye! We sure had a good laugh.
    Now back to painting... Like we previously said this project takes a lot of time!  We did two coats of paint on all the walls.  But once we were finished it was such a great feeling.  A simple new coat of paint can really give a new fresh feel to your classroom!
     Here is a sneak peak of the almost finished rooms!  They are starting to really come together!
     Emily's room with the new white wall.  
   Emily's gray accent wall. 
     Kassidy's front wall painted white.

Thanks for visiting! Keep checking back for more upcoming projects and our finished classrooms!

-Kassidy and Emily


Sunday, August 2, 2015

Chalkboard Tabletops!

We have been SO excited to share our favorite Classroom Makeover project that we've done this year!...Our CHALKBOARD TABLETOPS! We started out with all of our tables being a boring wood color like this:


These are the supplies we used:


We first primed all of our tables. (We had our primer tinted to a dark gray, and did two coats to ensure full coverage.) It dried pretty quick! We put one coat of primer on all of the tables (about 8) in one of our rooms, and then did the same in the other room. By the time we got back to the tables in the first room, they were ready for the second coat!

After the second coat was dry, we applied the first coat of Chalkboard Paint. It goes on pretty thin at first, so we ended up doing 3 coats of the chalkboard paint on each table. Just like we did for the primer, after we applied one coat to all of the tables in one room, we would go to the next room and do the same. We went back and forth between rooms to apply the next coat. For 8 tables, we used about a can and a half of the chalkboard paint all together. (It is about $10 a can at Lowes.) Great deal huh?! Another nice thing about painting these table tops was that we didn't have to do any dreaded prep work like taping! Here are what our tables looked like with 3 coats of chalkboard paint applied:

We wanted to add our own personal touch to add some color and cuteness to our tables that coordinated with our rooms, so we did this:


Emily used bright colored Duct Tape around the edges of her tables. She got the duct tape at a variety of stores including Walmart, Michael's Arts and Crafts, and Lowes. They turned out super cute huh? Note: Duct Tape Brand is the ONLY tape that will stick to the tables!


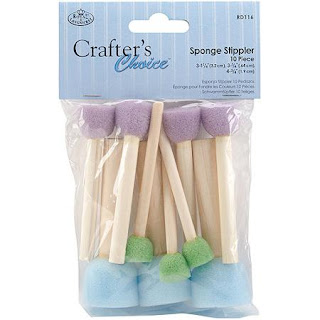
Kassidy used this acrylic paint in the color "Ocean Breeze" for the dots around the horseshoe tables, and a white acrylic paint in the same brand for the student tables. She used a round sponge brush to apply the dots. (She used the largest size sponge in the pack). The paint is from Michael's Arts and Crafts, and the sponges are from Walmart.

 
Our chalkboard tables are by far our FAVORITE project we have done this summer! We are really happy with how they turned out, and we think the students will have SO MUCH FUN writing on them this year! We will be sure to post our students doing activities with our new chalkboard tables this year. You can use them for practically anything...a quick quiz, handwriting practice, as a reward, you name it! We just LOVE projects that are simple, functional, and of course cute! This project fits into all of these categories!

 If you have any questions, please don't hesitate to comment below or email us at keclassworks@gmail.com. We'd be happy to help in any way!

Thanks for visiting! Keep checking back for more upcoming projects!

-Kassidy and Emily